
The Manage Fields section is where you add all of the Fields for your app and to set the general settings for the respective form.
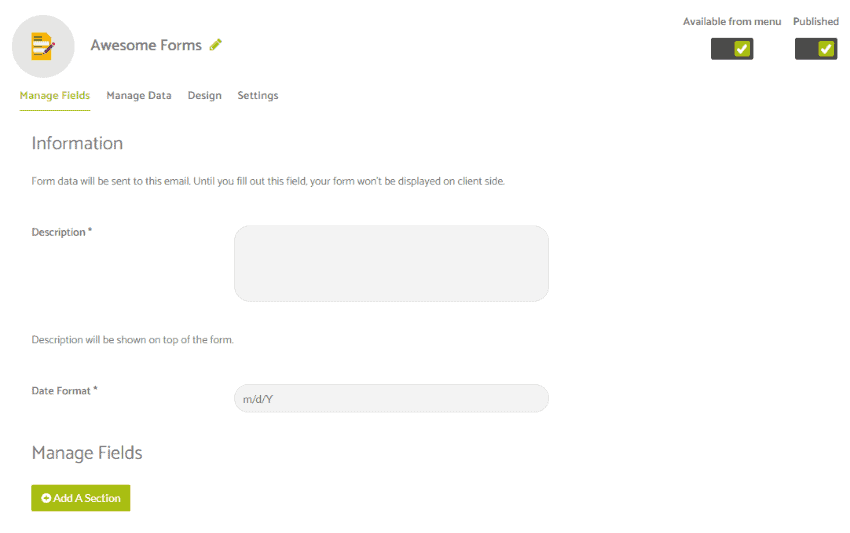
- DESCRIPTION – The general purpose/description of the form as seen by the App Users.
- DATE FORMAT – Select if you want your date format displayed as MM/DD/YYYY or DD/MM/YYYY
- ADD SECTION – Use this function to separate your Form into different sections (ie Categories).
- ADD FIELD – Click this button to add a field to your form. Upon clicking the button, you will then be given options to give the Field a name, and select the options for the Field, and to select the Field Type.
Note: You will need to add a section before you can add any fields.
Adding A Section
To add a section, click the button for ‘Add A Section’ beneath the Manage Fields Heading.
Provide the name for your section.
Once added, you will then have the option to add a field in to that section you have just created.
Adding A Field
To add a field to the section you have created click the Add A Field button shown underneath your section.

When clicked, you will see a lightbox pop up with an options panel for the field creator.
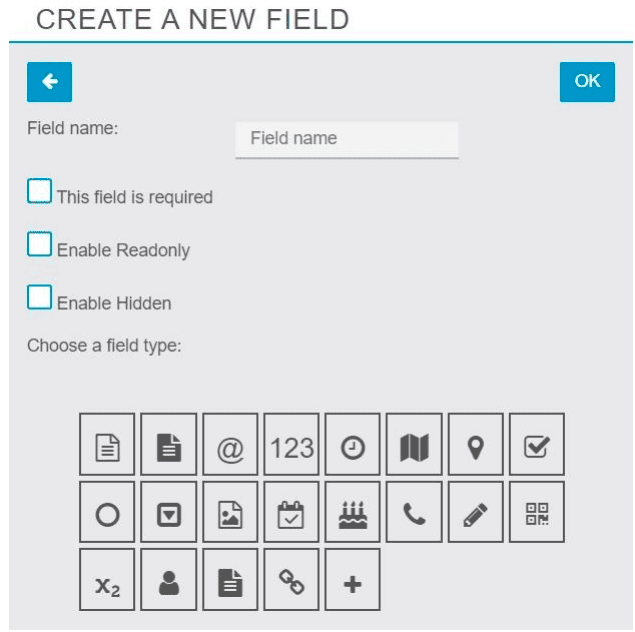
This will allow you to configure the following –
- Field Name – The frontend name that the App User will see. This will explain to the App User the type of information that should be entered in this section/field of the form.
- This Field Is Required – Select this option if the App User must enter data for the respective field.
- Enable Readonly – Use this option if you do not want the App User to be able to edit the field. This option is useful for fields that contain calculations.
- Enable Hidden – This option will hide the field from the App User. This is another option that is useful for fields that contain calculations. Often, you may not want the App User to see fields that are calculating data that is entered on the form. In these cases you would use this option.
Available Field Types
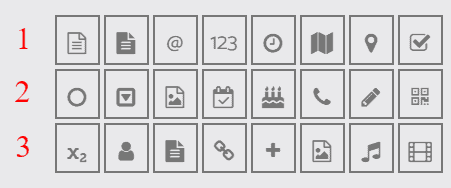
Row 1
Inside row 1 of the available field types, from left to right you have –
– Text
– Multiline Text
– Email Address
– Numerical
– Date
– Geolocation
– Address
– Checkbox
Row 2
Inside row 2 of the available field types, from left to right you have –
– Radio
– Dropdown
– Image
– Anniversary
– Birthday
– Telephone
– Signature Pad
– QR Scanner
Row 3
Inside row 3 of the available field types, from left to right you have –
– Formula
– Account
– Clickwrap
– Link
– Auto Increment
– Cover Image
– Audio
– Video
After selecting the Field type, click OK to save your choices.