
In the Classes tab you can Manage existing classes or add new classes.
To add a class, click on the + Add option.
This will allow you to add new classes for the types of appointments clients are able to book with your business.
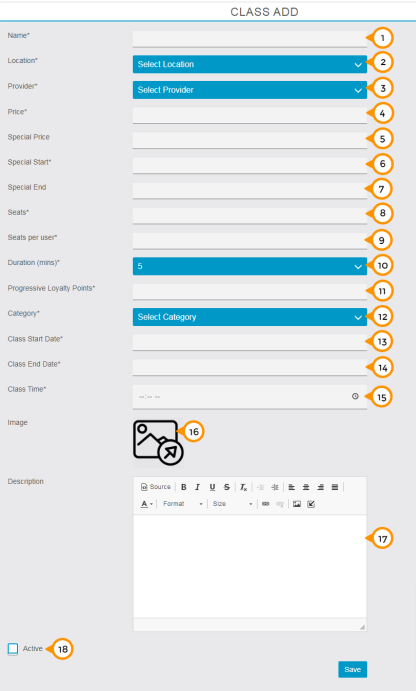
1) Here you need to enter your class name.
2) Here you need to select your location for class delivery from the drop down menu.
3) Here you need to select the provider for class from the drop down menu.
4) Here you need to enter the price of the complete class or complete course of the class.
5) Here you can mention the special price for offer.
6) Here you can mention the start date of your class offer period.
7) Here you can mention the end date of your class offer period.
8) Here you need to declare the available seats for class.
9) Here you need to mention seats per user means how many seats you want to sell at a time.
10) Here you need to mention the class duration for each session.
11) Here you need to mention the progressive loyalty points you want to transfer on each successful service delivery.
12) Here you need to select the category of your class.
13) Here you need to mention the date on which you going start to deliver the class.
14) Here you need to mention the date on which class will end.
15) Here you need to mention the daily class time on a particular location.
16) From here you can upload the image of the class.
17) Here you can share the details and course contents of the class.
18) By Check/Uncheck on ‘Active’ check box you can enable or disable the particular class in the app.