
Inside this training module we will look over setting up the custom domain for your PWA applications but before we get to this process, please ensure you have completed the two previous steps –
Step 1 – Generating Your PWA Application
Step 2 – Using A Custom URL For Your PWA
How To Acquire Your App Name and ID
Log in to your app builder dashboard and select manage on the application you want to use your custom domain / custom sub domain for.
When that has loaded, you will see on the left side menu the option titled Publication.
Select that from the menu and you see a page with all the apps held within your account in a list.
Under the app you want to create this for, there will be a box you can expand under the title Advanced Settings as shown in the image below.
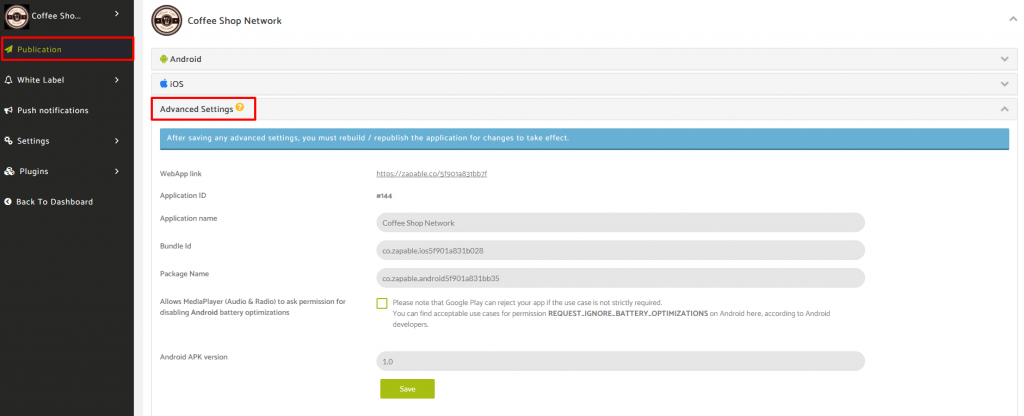
Inside the Advanced Settings the first item you can see is the Web App Link and it the part of this url that we need to complete the form below.
Copy and paste the text shown after this part https://zapable.co/
So in the example shown above, the App ID needed for the form is: 5f901a831bb7f
For the App Name field in the form below, copy and paste the text shown in the Application Name field on the above image from your account.
Your PWA Domain URL
In the PWA domain URL field in the form you need to provide the url (subdomain or full domain depending on what you are using) and this needs to have been set up correctly following the 2 previous tutorials that you can find links to at the top of this page.
This will not work unless those tutorials have been completed and then the form below needs to be submitted, and our team needs to confirm with you by return email that this has been done before the app will display on the url you have submitted.
With that being said, if you’ve completed step 1 and step 2, you can complete the form below.