
In this sub section of the Commerce feature we are going to want to navigate to the Products section found under the sub menu heading of Catalog.
In here we are going to want to add in the products that a business is offering, maybe this would be a food item if we were following the restaurant example theme referenced in these tutorials. We can add this just like a normal product in the Commerce feature with a description, some images of the item and a price that this item retails for.
We’ll also want to make sure that we assign this product to the correct Category that is also tied to the business we added under the Stores section.
So for example, if we had a Cheeseburger as our product, we would want to make sure that was assign to our Burger Sub Category that falls under the Fast Food Category we had set up under our My Categories section of this training.
This is because our example business Joy Steak House, has a Categories section on the page above the products that can filter their Products by type based on what Category the product is assigned to.
There is also a sub category filter on this product page too where you can further drill down in to specific sub categories.
In one of our examples of this we used Drinks as the Category, and inside that there was the offering of Shakes, Cold Drinks and Coffees.
Here’s an example Product listing from our demo directory.
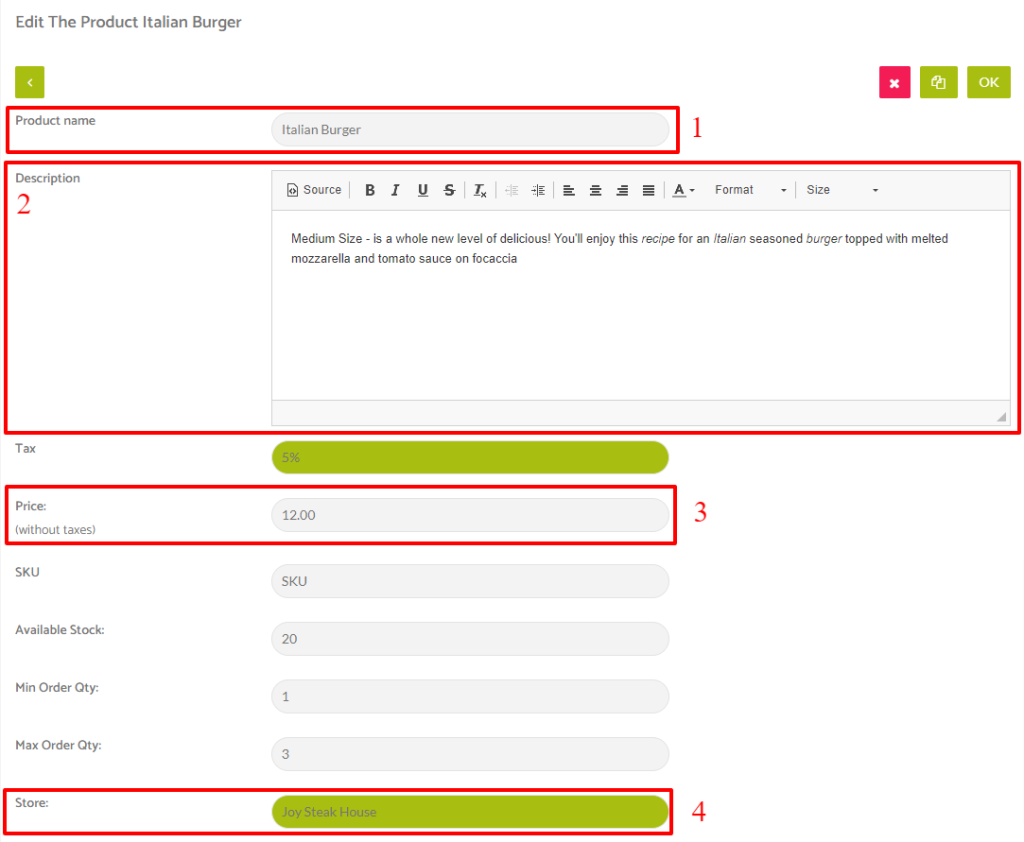
Notice in this above example 4 sections we have marked out.
1 being the product name.
2 being the product description.
3 being the price of this product.
and 4, one of the most important ones, the store that this product is linked to.
Making sure 4 is set correctly ensures that this product shows up under the appropriate store.
Here’s another image from this product listing from further down the page of this listing and here we have two key sections from this part.
Point 1 is the image we have uploaded of the item
and point 2 is the Product Category we have assigned the product to.
