
Under the membership section you can create your own memberships for property listings in the App. You are able to create multiple membership plans in the app as per your requirements. Let’s see how we can create a membership plan.
Open the Property Feature that you have added to your application and choose the Memberships option from the sub menu as shown below.
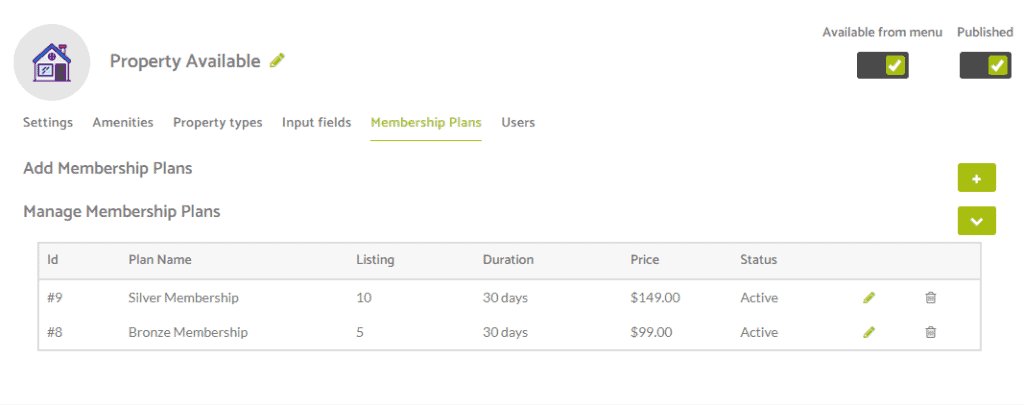
From here you are able to view your existing membership plans as well as go on to create your first or additional levels if you have done this step previously.
To add a new membership plan, select the + icon to the right side of where it says Add Membership Plan and you’ll then be presented with an options panel as shown below, that you can go on to populate as required.
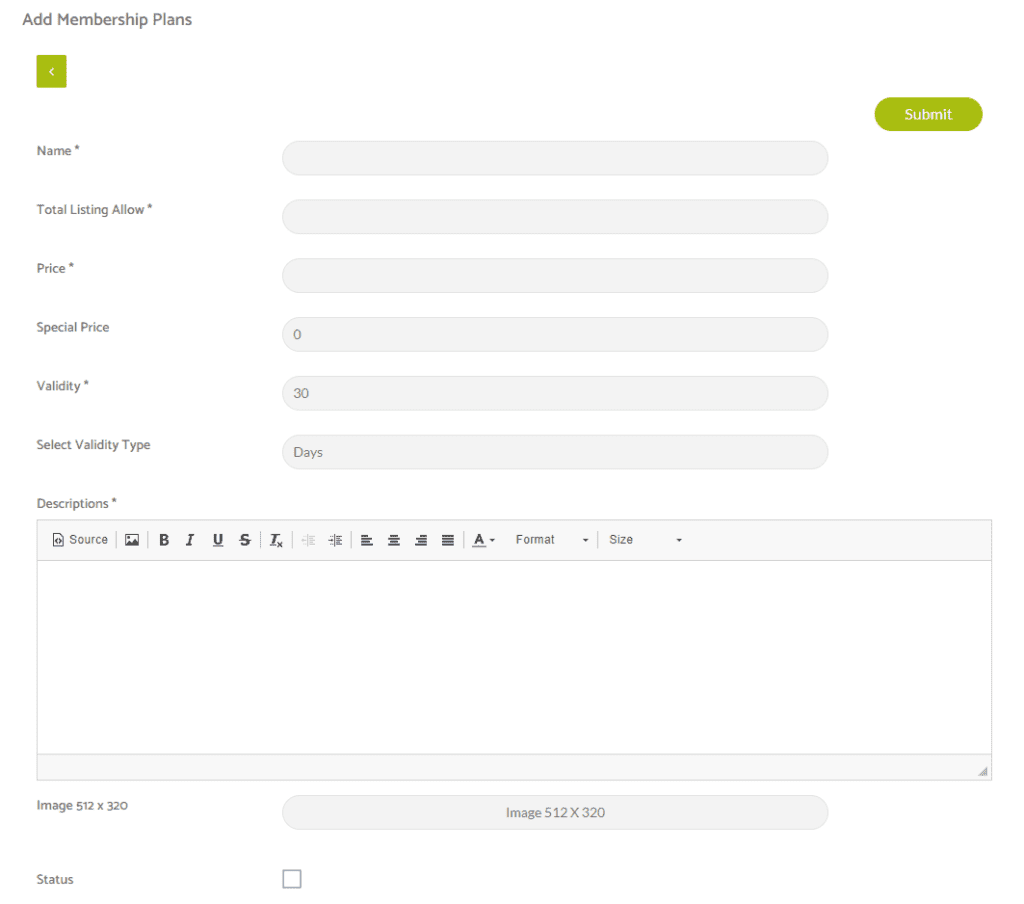
From the above image you can see that you provide the following information –
1) The name of the membership plan.
2) The total number of listings the user is allowed within the limits of the plan.
3) The price of the plan.
4) You can add a Special Price if you want offer a discount and this price will be used instead of the above.
5) The numerical validity of the plan.
6) The Validity Type, whether it is Days or Month and this uses the numerical validity above in it’s display.
7) A description for the membership plan.
8) An image for your membership plan.
9) A check box you can check/uncheck to activate or deactivate the membership plan.