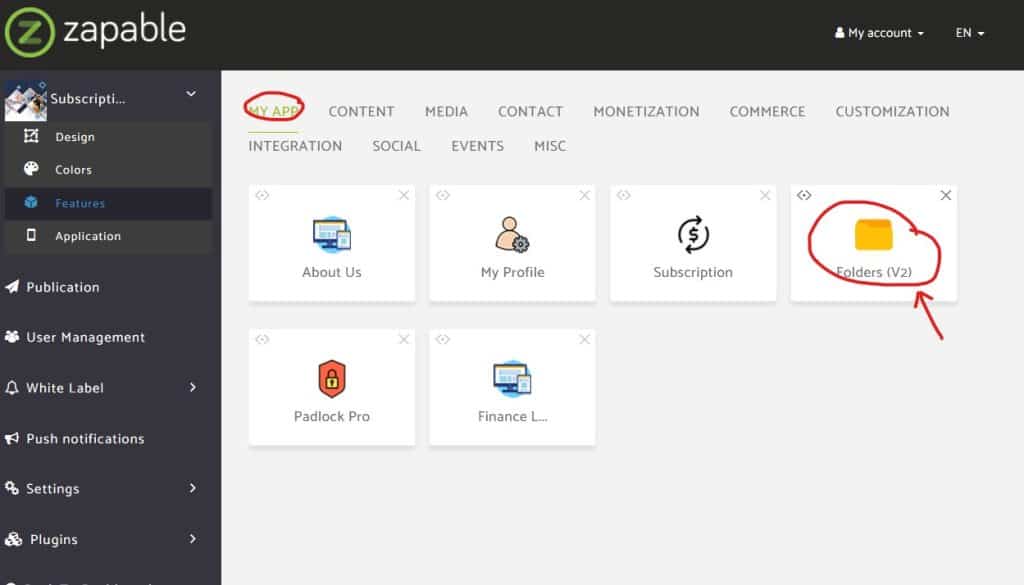
Click On The Folder (V2) feature
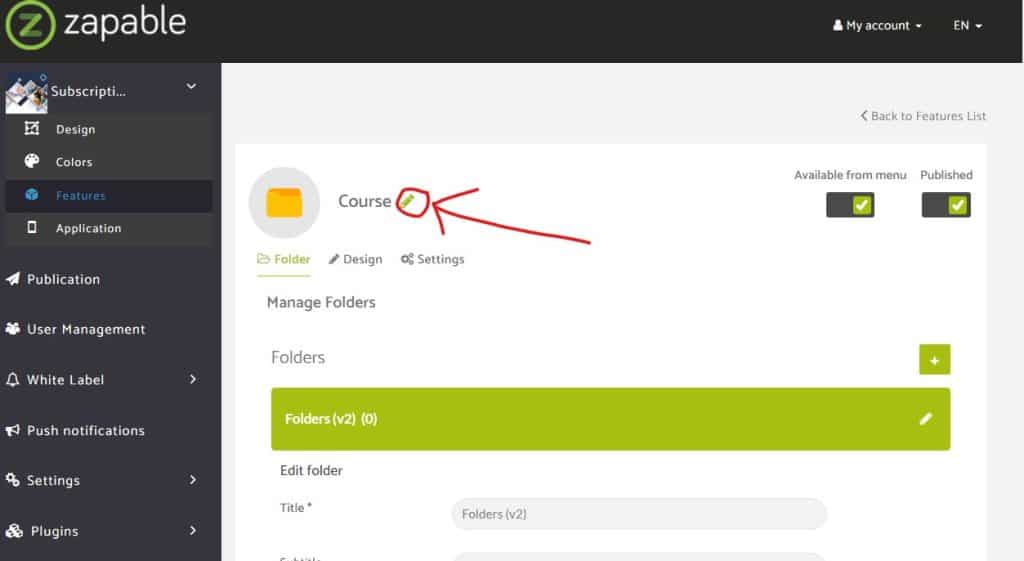
Rename The Folders (V2) by clicking on the pencil icon. In this example, I will call it “Course”
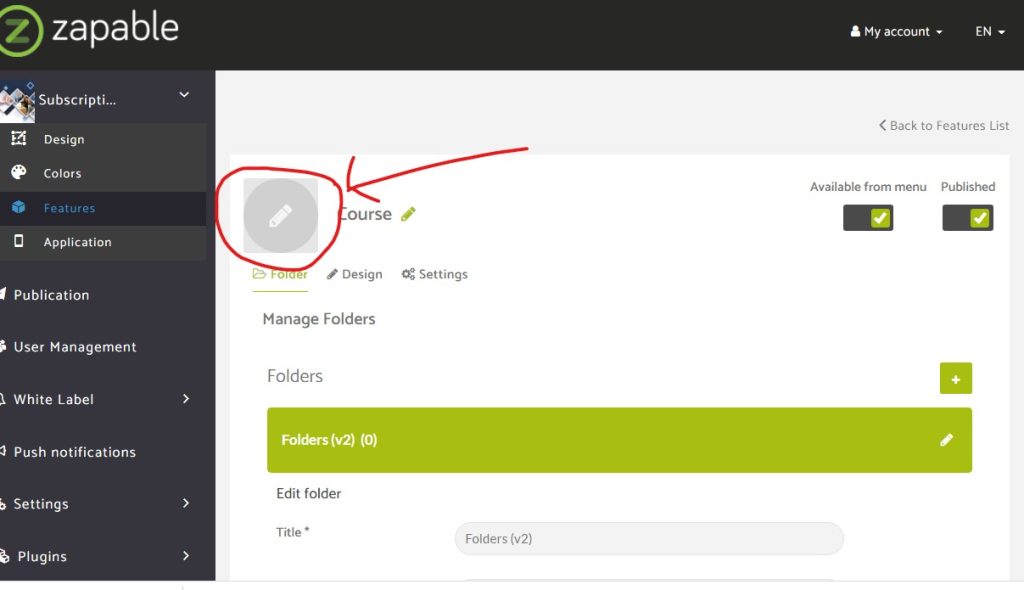
Left click on the icon to change it. You can uploaded your own or select from some of the ready made
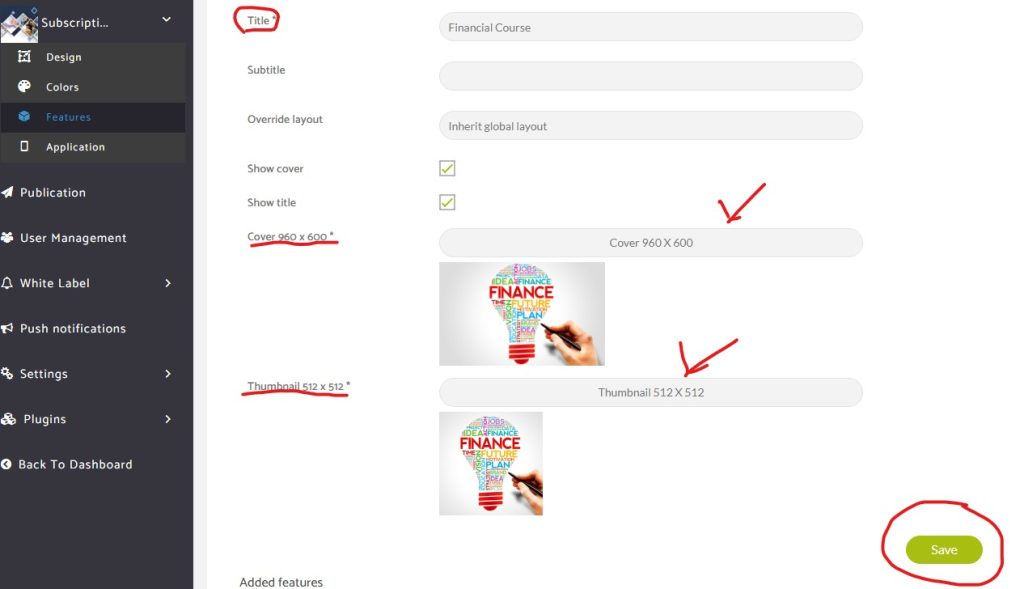
Add Title, and a cover image to the Folders feature and click SAVE
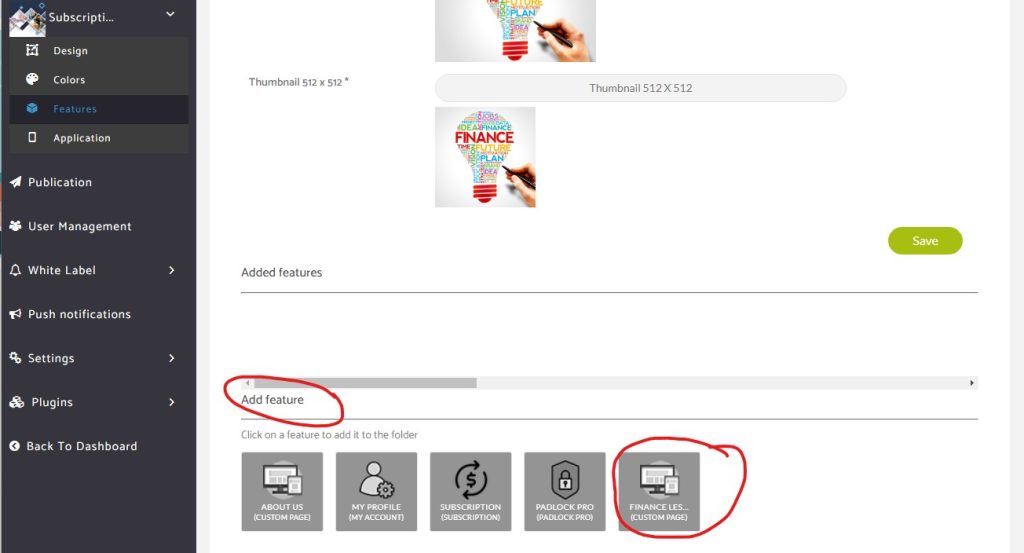
Add my first-course lesson
Using the one I created earlier. Left-click on the “feature” I want to add. In this case, it is Finance Lesson 1 (Custom Page). Then click on Save
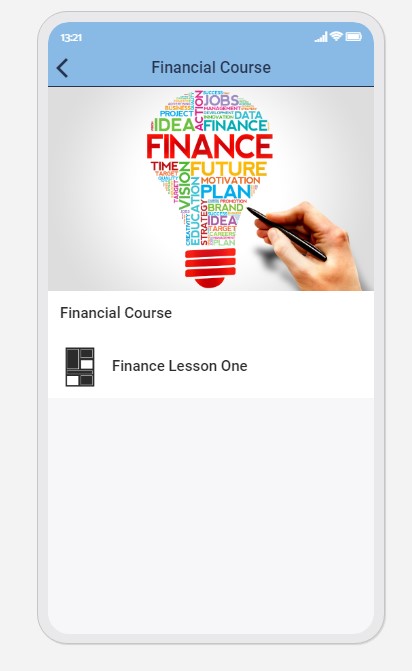
CONGRATULATIONS.
We have now added our first lesson to our course folder. This step will need to be repeated for each lesson of the course you create. Most courses will consist of multiple “custom page” features