
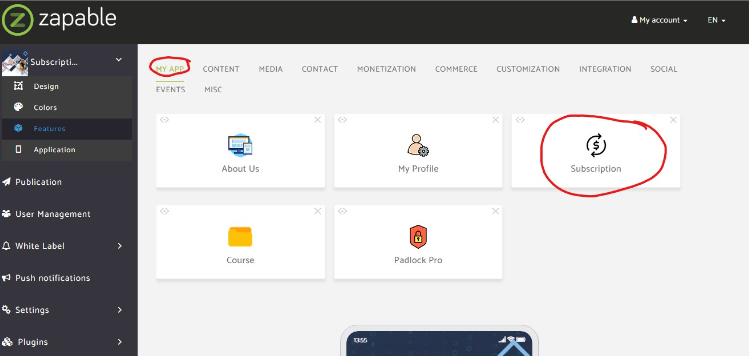
Click on the subscription module under my app
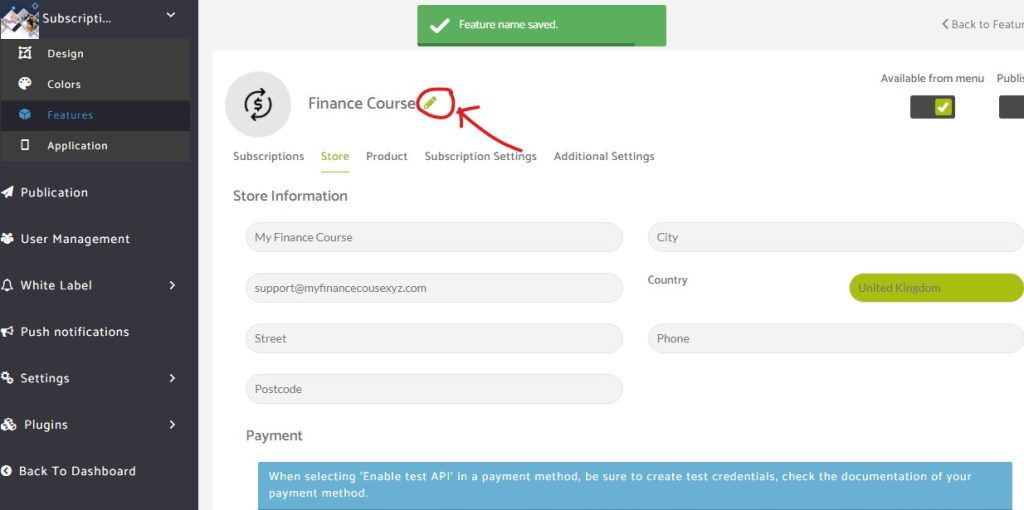
Change the name of the Subscription module to my course name. Change to “Finance Course”
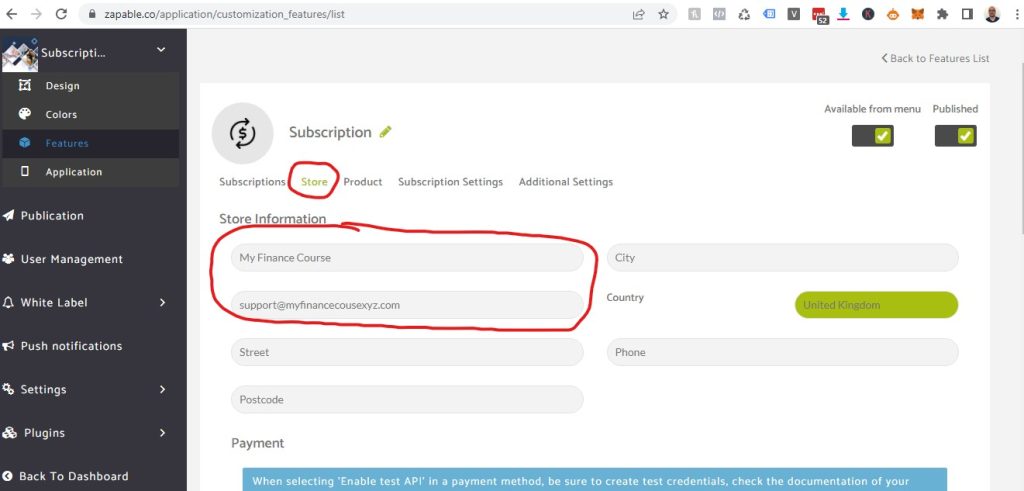
Click on store and enter your store name and details. Street/Postcode/Phone/City are all optional. As this is an online app course I will not be entering those details.
Setting up Payment Options
Paypal: Do not enter your Paypal username and password here. This is for the Paypal app setup only. To learn how to setup Paypal please visit here
https://zapable.co/academyblog/training/settings/api-keys/paypal/
Credit Card (Stripe)
To do that you just have to select the option “credit card (online payment)” and fill out the two sections “Secret Key” and “Publishable key” you obtained on Stripe.
Creating Your Product Name And Price
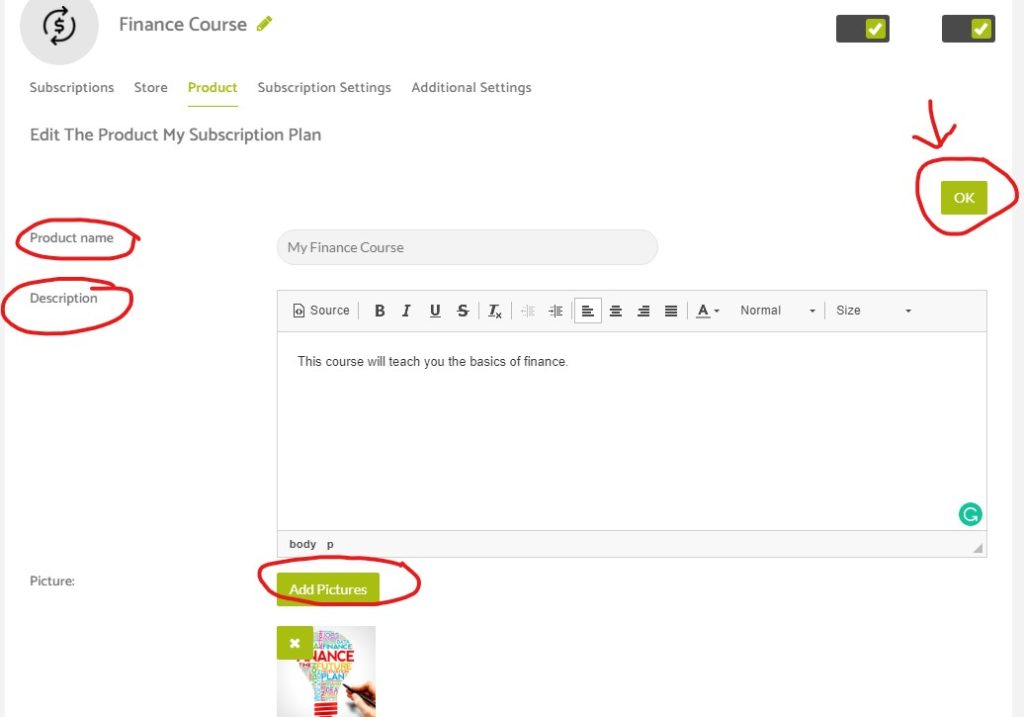
Click on Product. Enter Your product name, and description, along with the course picture. Click ok to save
Note: The image you uploaded has to be a .jpg
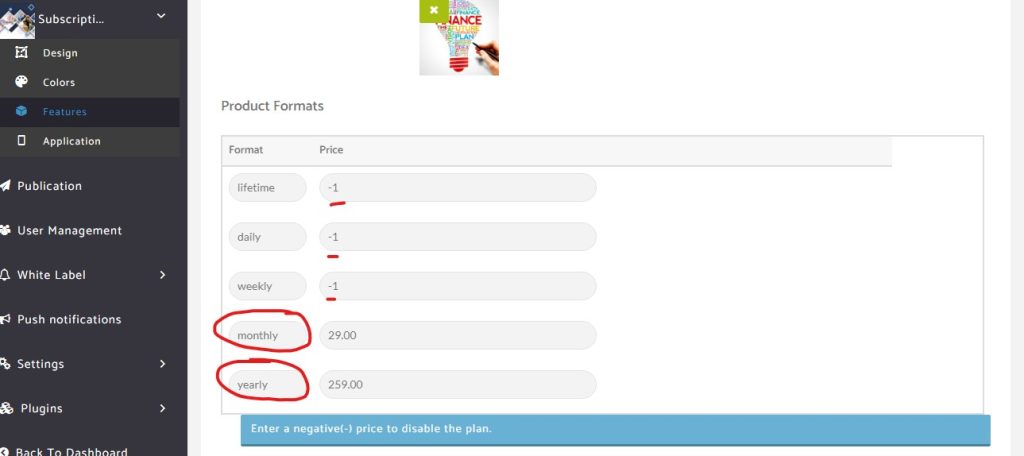
Next select your price options. I am going to choose to have a yearly subscription and monthly subscription. To disable the other pricing options I put in a negative price.
Click Ok to save
Protecting Your Course And Creating Your Messaging
I am going to set a
Welcome Message – Welcome To My Finance Course
Renewable Reminder Message – Thanks For Staying With Us
Member Message – Welcome To Your Personal Finance Course
Protecting the course: Next I will select the “Course” folder I create prior to this in Step Eight
