This is a whitelabel account holder feature only.
Inside this training module we will look over setting up the Whitelabel feature using CloudFlare’s DNS Management.
Tutorial Sections
Buying A Domain Name
Registering An Account With CloudFlare
Adding A Domain Name To CloudFlare
Adding CloudFlare Nameservers To Your Domains DNS
Adding Your CNAME Record To Your CloudFlare Account
Configuring The Whitelabel Settings In The App Builder
Troubleshooting The Uknown Error Message
Step 1 – Buying A Domain Name
The first step to undertaken in this setup process is to buy a domain name that you want to use for your whitelabel website that your clients will type in to their browsers in order to access your login page that will allow them to be able to manage their application.
For domain name purchases you can use a reputable domain registrar like namecheap.com.
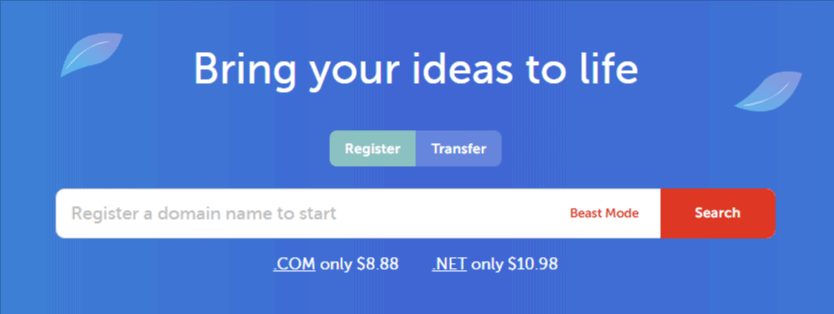
Once you have purchased a domain name you can then move on to step 2, registering an account with CloudFlare.
Step 2 – Registering An Account With CloudFlare
The next step is to register an account with CloudFlare so that you can manage your DNS there.
Go to cloudflare.com and select the Sign Up option found in the menu across the top.
When you do this it will ask you to set up your account by providing your e-mail address and the password you wish to use for your account.
Go ahead and provide those details and these will be what you use to sign in to your CloudFlare account at any point in the future.
Step 3 – Adding A Domain Name To CloudFlare
Once you have added your e-mail address and password, you’ll be prompted to add a domain name that you want to use within this account as shown in this image below.
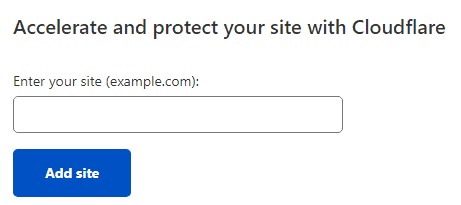
Go ahead and add in the domain name that you have purchased earlier in this setup process.
You’ll then be asked to choose the CloudFlare plan that you would like to use for this account.
Below the paid plan options you will see the ability to choose the Get Started For Free plan option.
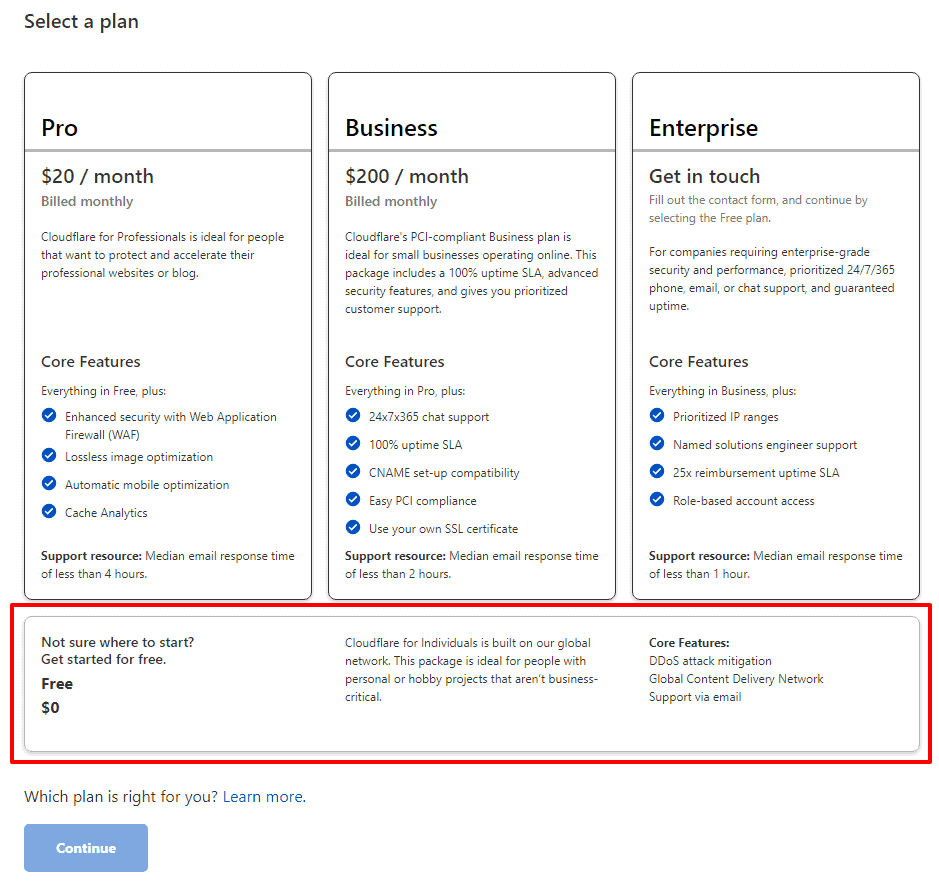
Select that option and click on the blue continue button at the bottom.
The CloudFlare system will then scan the domain to find any existing DNS records that may be in place for this domain.
If this is a new domain, you might find it just has a single item on it which will be what’s known as a parking record. This just lets a website visitor know that the domain is owned and is under the control of a particular domain registrar. So if you see a record there in your results, don’t panic it’s likely meant to be there.
When you are ready, you can click the blue button to continue
Step 4 – Adding CloudFlare Nameservers To Your Domains DNS
The next screen you will see in CloudFlare is that it will ask you to set the nameservers for your domain name inside your account with your domain registrar. If you followed the steps in this tutorial, we would be referencing Namecheap when referring to the Domain Registrar.
On this page you will see what it asks you to use when adding the details for your nameservers.
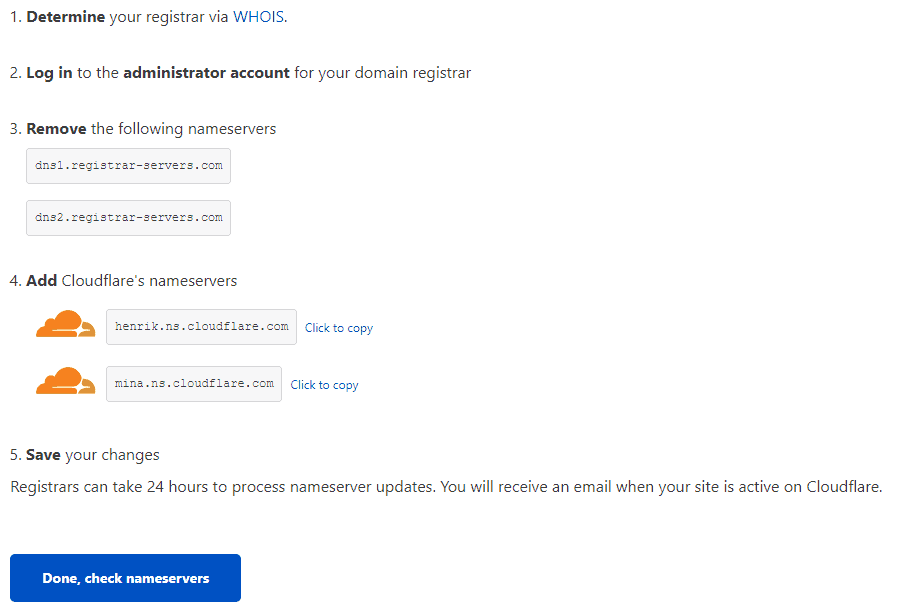
As you can see in the screenshot above, this domain we are using for this tutorial has nameservers set and yours most likely will not but you can see under Step 4 of their requirements, those are the two CloudFlare nameservers that need to be added inside our account with the domain registrar.
So let’s go and do that now.
Log back in to your domain registrar account (namecheap if you followed this tutorial) and go to manage your domains by clicking the Domain List option on the left menu or if you don’t see that, across the top of the website you will see a black bar, and on the left side will be your username for the site, hover over that and in the drop down that appears, choose Dashboard.
You can then choose Domain List from the left menu.
Then select to Manage the domain you’ve just acquired using the option on the right side (grey button).
You will then see a screen similar to the below.
Notice in this image we’ve added 4 red boxes to the image as these are the areas of important we need to look for.
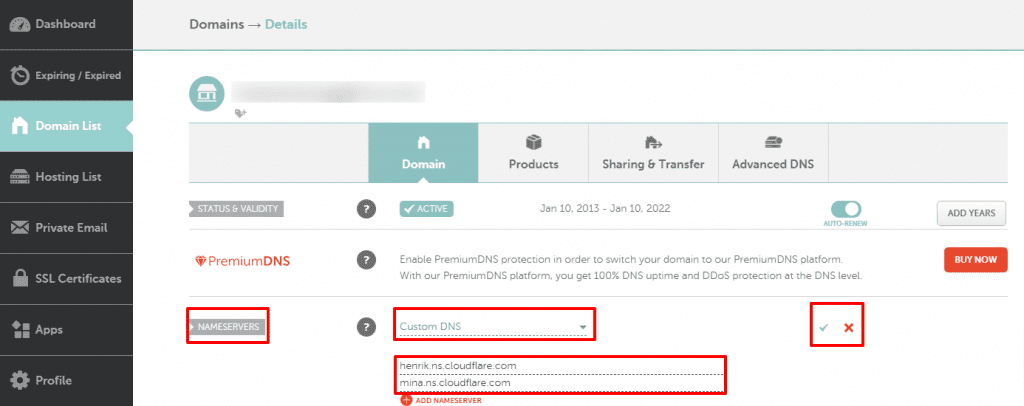
The first red box on the left side shows the section for Nameservers so with this showing we are in the right place.
The two boxes in the center are where we now need to bring our attention.
Where it says Custom DNS in our screenshot, this may say something different for you like Basic DNS. You can click this option and then you’ll need to change it to Custom DNS.
When you do this you’ll see the two lines appear underneath.
This is where you need to add in your nameservers provided to you by CloudFlare.
So copy and paste those nameservers you are given on CloudFlare into these two boxes, with one nameserver per line.
We then need to click the green tick option shown in the red box on the right hand side to save these changes.
DNS updates like this can take up to 48 hours to take effect but are more often than not much quicker, typically resolving within a couple of hours.
Once you’ve set these, you can go back to the CloudFlare screen and click the blue button to proceed.
If these records cannot be verified immediately (because it can take up to 48 hours to take effect), CloudFlare will e-mail you on the e-mail address you supplied to let you know when these are verified.
The next item you see will be CloudFlares quick start guide as shown in the image below.
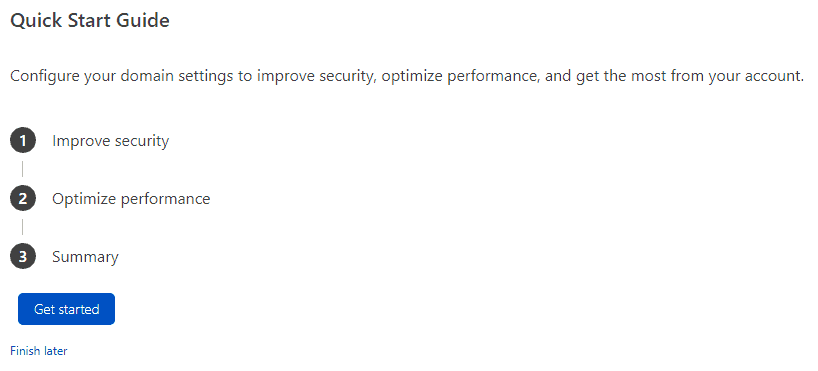
There is nothing we need to do here, so we can click the Finish Later link seen under the Get Started button.
When your account details have been updated and the nameserver change is live (and you’ve had the e-mail to confirm) the next time you log in to your CloudFlare account you will see the following.
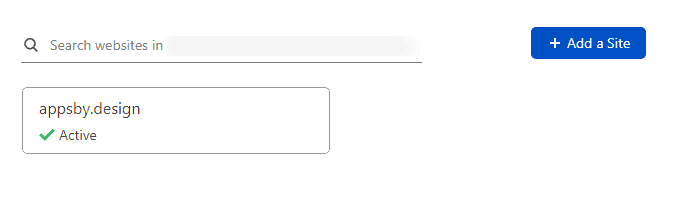
As you can see under the domain name in the box, there is a green check mark and the word Active.
This means CloudFlare now controls the DNS options panel and we can proceed to the next step below.
Step 5 – Adding Your CNAME Record To Your CloudFlare Account
The next step that we need to do is to add a record to our DNS that is going to display the whitelabel login we are setting up in this tutorial.
To do that log in to your CloudFlare account and select the domain you wish to edit.
Then across the top, where all the blue boxes are, you’ll see an option for DNS, select that and you’ll see a screen similar to the below.
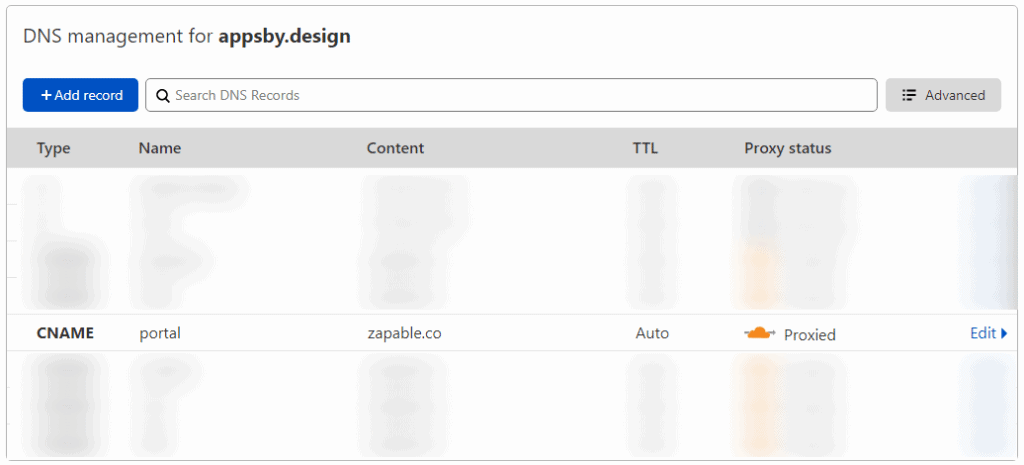
You may or may not have a record showing in your account but if so that does not matter. The above screenshot is showing the completed process at this stage which is where you’ll be in a few steps from now.
From here you want to click the blue + Add record button shown in the top left of that screenshot.
Under the Type option, choose CNAME.
For the Name field add in what you want your subdomain to be i.e. login or client or access etc.
In the Target field add in Zapable.co
As shown in this image below (just use what you want in the name field).
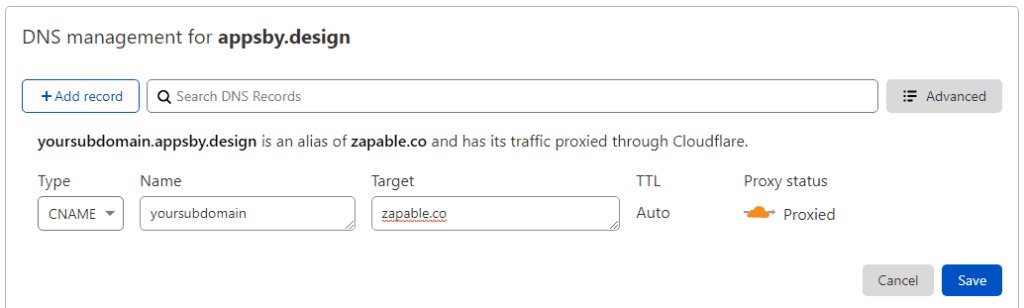
and then click the blue save button in the bottom right corner and this will add the CNAME record to your DNS.
Step 6 – Configuring The Whitelabel Settings In The App Builder
With all of the above completed, we can then proceed to the whitelabel settings screen within our app builder.
To get here, go to your builder dashboard and choose an application to manage.
Once that has loaded you should see the Whitelabel option on your menu down the left side.
Select it, and then in the menu that pops out below, choose the Settings option.
You will the see a screen similar to the below screenshot.

The first step is to check the box to enable Whitelabel.
You’ll then need to provide a name for this whitelabel area i.e. your business name.
The next field is for your host name and this is what we set earlier in the tutorial process.
A reminder, we talked about the example of login.yourdomain.com
Just make sure this matches what you set up in your CloudFlare account.
You will then need to provide a support url for your customers for where they would go if they needed assistance from you and so this could be yourdomain.com/support
The final fields to configure are the package name and bundle name.
The standard practice here is reversing your business domain name and using an identifier at the end.
So an example would be
com.yourbusinessname.application
Just adjust this to your own needs.
Once you have all the required fields populated, click the blue save button on the right side.
…and that’s it, you are done. You now have a whitelabel area configured.
Troubleshooting
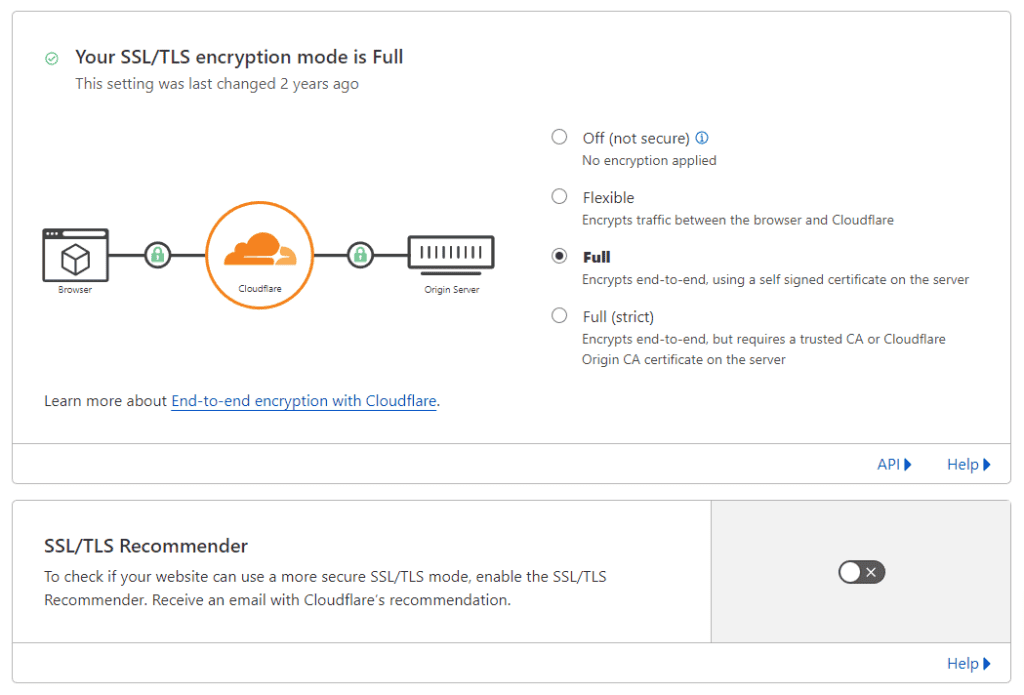
If you have an issue with your whitelabel account when signed in either as your main account or as a whitelabel user (whitelabel user management tutorial is here) and you receive repeated unkown error messages showing when trying to complete actions in the app builder, you’ll need to make adjustments in your CloudFlare account under the SSL / TLS settings.

The default option in CloudFlare SSL is set to Flexible but if you receive the repeated unknown error message you’ll need to change this setting to Full (not full strict) and this will resolve your issue.