
In this training module we are going to look over adding in our own custom smtp details into the whitelabel feature so that all emails sent from our account system will be branded with your own Sender Name and Sender Email Address.
Note: This is an account wide system and not a per app system, so email sent to all apps will come from the details you add here instead of notifications@zapable.com
Your email provider will be able to give you the details you need for smtp in their documentation or under your account details. This varies from provider to provider and so if you need assistance in getting them either search Google for your provider name followed by smtp or send in a help request to your provider to locate them.
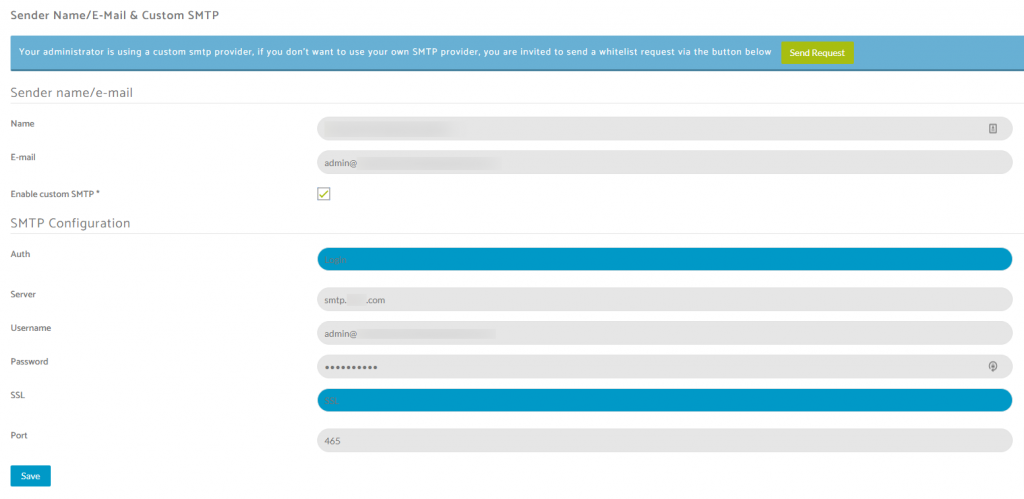
Once you have those details in hand you can complete the fields required as shown in the screenshot below.
You can add in the sender name you want to appear on your emails from the system and also the email address that is going to send the emails.
Make sure to check the Enable Custom SMTP box to reveal the bottom panel for configuration.
In the Auth section, this is usually set to Login but this can vary from provider to provider so if you are not sure, try this option first.
Then add in the Server, this is usually something like smtp.domain.com
Username is the email address you use to sign in (can vary so check your smtp details on your provider site)
Password is what you use to sign in to this email address.
SSL this can be SSL or TLS depending on your provider.
and finally Port, is usually a 3 digit number that can differ depending on whether SSL or TLS is used.
Once your details are in place, click the save button to add these details in to your account.
You can test this feature by creating a new account within one of your apps and then you’ll receive an email to that address that will be sent from the details you have set up here.